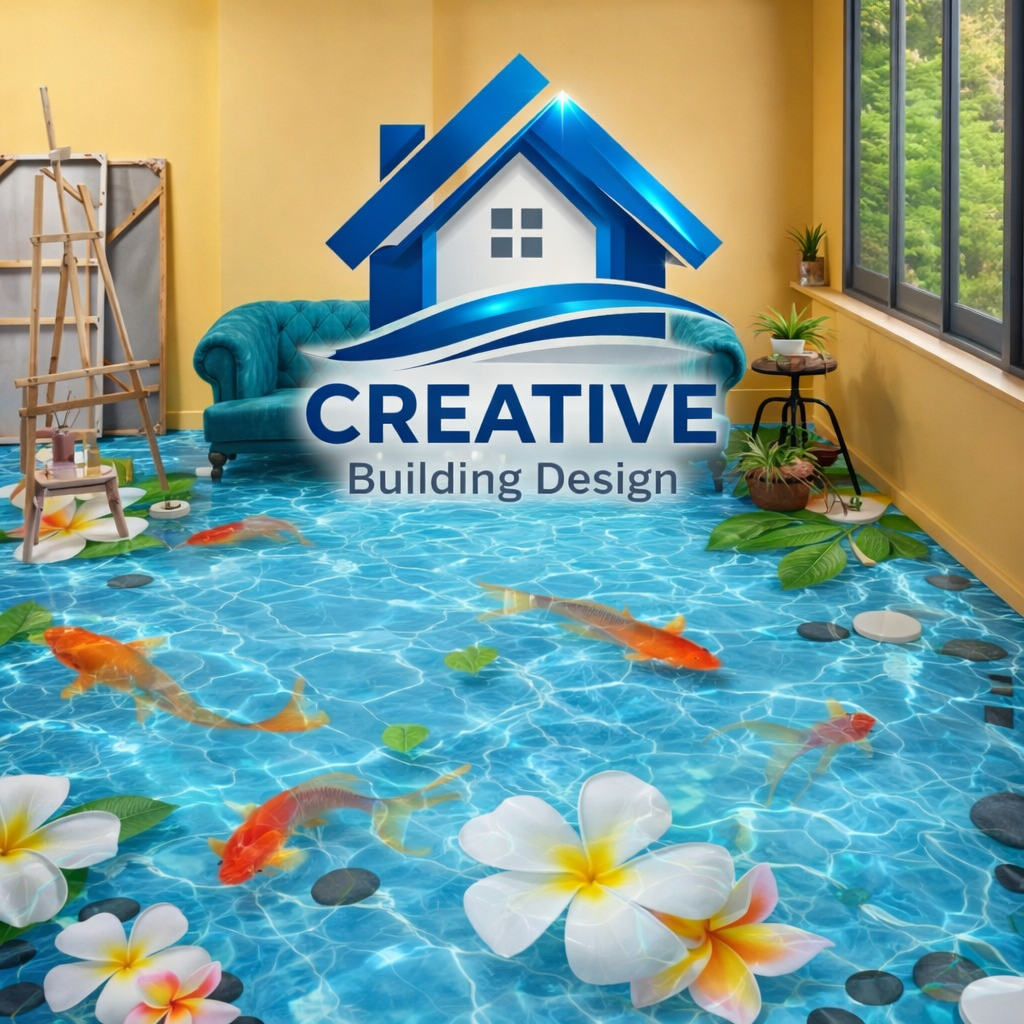
3D floor design has emerged as a transformative approach in interior design, allowing for innovative and visually captivating spaces. This technique combines art, technology, and creativity to create stunning floor aesthetics that can drastically alter the perception and functionality of a room. From residential homes to commercial spaces, 3D floor designs have gained popularity for their ability to evoke emotion, inspire creativity, and enhance the overall ambiance of an area.
The Origins of 3D Floor Design
The concept of three-dimensional design is not new. Historically, artists and architects have employed various techniques to create illusions of depth and dimension in their work. However, the modern iteration of 3D floor design began gaining traction in the late 20th century, coinciding with advancements in digital technology.
Initially used primarily in commercial spaces like shopping malls and exhibition centers, the technology and techniques of 3D floor design have expanded to residential applications as well. With the advent of specialized materials and printing technologies, designers can now create intricate, lifelike patterns and images that transform traditional flooring into engaging visual experiences.
The Components of 3D Epoxy Flooring
The creation of 3D epoxy flooring involves several components:
- Base Layer: The first step in the installation process is applying a base layer of colored epoxy. This layer acts as a foundation for the 3D effect and sets the tone for the overall design.
- Printed Image or Design: A high-resolution image or design is printed on a special material, which is then laid over the base layer. This image can be anything from a natural landscape to abstract art.
- Transparent Epoxy Layer: After the printed image is in place, a clear epoxy layer is poured over it. This layer adds depth and protection to the design while giving the floor a glossy finish.
- Finish and Seal: Once the epoxy has cured, a final seal is applied to enhance durability and shine.
Techniques in 3D Floor Design
1. Epoxy Flooring
One of the most popular methods for achieving a 3D floor effect is through epoxy flooring. Epoxy is a resin-based material that is both durable and versatile. Designers can create a seamless, glossy finish that can incorporate vibrant colors and intricate designs. The process typically involves:
- Preparation: The existing floor is cleaned and prepped to ensure a proper bond.
- Application: Multiple layers of epoxy are applied. Each layer can be tinted, and designs can be created by embedding materials or pigments.
- 3D Elements: For true 3D effects, artists may add elements like sand, beads, or even realistic images that appear to pop off the floor.
2. 3D Printed Tiles
Another innovative technique is the use of 3D printed tiles. With advances in printing technology, designers can create custom tiles that feature detailed textures and patterns. These tiles can be combined in various ways to form a cohesive design that maintains its three-dimensional qualities.
- Customization: Clients can choose designs that reflect their personality or branding, making spaces truly unique.
- Variety of Materials: From ceramics to composites, the choice of material can affect both the appearance and functionality of the floor.
3. Vinyl and Linoleum with 3D Designs
Vinyl and linoleum flooring options have also embraced 3D designs. Modern printing techniques allow manufacturers to create flooring that features photorealistic images and textures.
- Affordability: Compared to other 3D flooring options, vinyl and linoleum can be more budget-friendly, making them accessible for residential use.
- Easy Installation: These materials are typically easier to install than epoxy, allowing for quick upgrades to existing spaces.
Applications of 3D Floor Design
1. Residential Spaces
In homes, 3D floor design can be used in various rooms to create focal points or enhance themes. Popular applications include:
- Living Rooms: A stunning 3D effect can serve as a conversation starter. Options range from serene ocean waves to abstract patterns.
- Kitchens and Bathrooms: These areas benefit from durable, easy-to-clean surfaces. 3D designs can mimic natural stone or create the illusion of a pool or spa.
- Kids’ Rooms: Bright and playful 3D designs can turn a child’s room into a fantastical environment, with themes like outer space or jungle adventures.
2. Commercial Spaces
For businesses, 3D floor design offers an opportunity to make strong impressions on clients and customers. Applications include:
- Retail Stores: Eye-catching floor designs can draw customers into a store, guiding them through the space while reinforcing branding.
- Restaurants: Unique flooring can enhance the dining experience, contributing to the overall theme and atmosphere of the establishment.
- Corporate Offices: 3D flooring can be used to create a dynamic work environment that fosters creativity and innovation.
3. Public Spaces
Public spaces such as museums, galleries, and parks can also utilize 3D floor design to enhance visitor experience. These designs can create pathways, highlight exhibits, or provide informational graphics.
Benefits of 3D Floor Design
1. Aesthetic Appeal
The most immediate benefit of 3D floor design is its visual impact. These floors can dramatically enhance the aesthetics of a space, making it more engaging and attractive. A well-designed floor can serve as a work of art in itself.
2. Customization
3D floor design allows for a high degree of customization. Clients can work with designers to create unique patterns, colors, and images that reflect their personal style or brand identity. This level of personalization can make a space feel more inviting and tailored.
3. Durability
Many materials used in 3D floor design, such as epoxy and vinyl, are incredibly durable. They can withstand heavy foot traffic, resist stains, and are often easy to clean, making them suitable for both residential and commercial applications.
4. Illusion of Space
3D flooring can create illusions that alter the perception of space. For example, a design that mimics depth can make a room appear larger or more open. This is particularly beneficial in smaller areas where maximizing space is essential.
5. Enhancing Mood and Atmosphere
Colors and patterns significantly influence mood and atmosphere. A well-thought-out 3D floor design can evoke emotions, promote relaxation, or energize a space. For instance, calming ocean designs can create a serene bathroom, while vibrant patterns can enliven a playroom.
Considerations When Designing 3D Floors
1. Space and Scale
Before embarking on a 3D floor design project, it’s crucial to consider the space and scale of the area. Large patterns can overwhelm small rooms, while tiny details may get lost in expansive spaces. Designers must strike a balance that enhances the area without overpowering it.
2. Functionality
While aesthetics are important, functionality should never be overlooked. High-traffic areas require durable flooring that can withstand wear and tear. Additionally, slip resistance is crucial in areas like kitchens and bathrooms where spills may occur.
3. Maintenance
Different materials have varying maintenance requirements. Epoxy floors are generally easy to clean, while certain vinyls may require special cleaners to maintain their appearance. It’s important to discuss these factors with clients to ensure long-term satisfaction.
4. Budget
Budget considerations will influence material selection and design complexity. Custom designs and high-quality materials may come at a premium, so it’s essential to have an open dialogue with clients about their budget constraints.
5. Professional Installation
3D floor designs often require professional installation to ensure quality and longevity. Choosing experienced contractors who understand the intricacies of these materials and techniques is vital for achieving the desired outcome.
Design Options for 3D Epoxy Flooring
The versatility of 3D epoxy flooring allows for an endless array of design possibilities. Here are some popular options:
1. Nature-Inspired Designs
Nature themes are a popular choice for creating a serene and calming atmosphere. Designs can include realistic representations of forests, oceans, or landscapes. For instance, a bathroom with a 3D epoxy floor featuring a sandy beach or underwater scene can provide a tranquil retreat.
2. Geometric Patterns
For a modern and contemporary look, geometric patterns are an excellent option. Bold shapes and vibrant colors can create a striking visual impact, making them perfect for commercial spaces like showrooms and boutiques.
3. Custom Logos and Branding
Businesses can utilize 3D epoxy flooring to incorporate logos and branding into their space. A coffee shop, for example, might feature a floor design that includes its logo, reinforcing brand identity and enhancing customer experience.
4. Artistic and Abstract Designs
Artists and designers can take full advantage of 3D epoxy flooring by creating abstract designs that draw the eye and evoke emotion. These artistic floors can serve as conversation starters in galleries, studios, or homes.
5. Themed Spaces
For themed environments, such as gaming rooms, children’s play areas, or themed restaurants, 3D epoxy flooring can bring the theme to life. Imagine a game room floor designed to look like a video game world or a playroom with bright, playful colors and characters.
6. Abstract Art
For a more modern look, abstract designs featuring bold colors and shapes can make a striking statement. These designs can complement contemporary décor and are perfect for art studios or creative spaces.
7. Custom Logos and Branding
Businesses can leverage 3D epoxy flooring for branding by incorporating company logos or thematic designs. This not only enhances the aesthetic appeal but also strengthens brand identity.
8. Interactive Designs
Some 3D epoxy floors can incorporate interactive elements, like designs that change color based on the angle of light or the viewer’s perspective. This adds an engaging layer to the flooring experience.
9. Seasonal Themes
Consider changing the design seasonally for a fresh look throughout the year. For instance, floral patterns for spring, beach scenes for summer, autumn leaves, and winter wonderlands can keep the space feeling vibrant and relevant.
The Future of 3D Floor Design
As technology continues to evolve, the possibilities for 3D floor design are virtually limitless. Innovations in augmented reality (AR) and virtual reality (VR) could allow clients to visualize their spaces before committing to a design. Furthermore, sustainable materials and eco-friendly practices are becoming increasingly important, leading to new developments in flooring options.
Additionally, the rise of online design platforms may empower homeowners to experiment with 3D floor design themselves, creating personalized designs that can be executed by professionals.
How to Install Epoxy 3D Floor?
If you’re considering installing a 3D epoxy floor, this guide will walk you through the entire process—from preparation to finishing touches.
Tools and Materials Needed
Before you begin, gather the necessary tools and materials:
- Tools:
- Measuring tape
- Mixer (drill with a mixing paddle)
- Squeegee
- Roller (with extension handle)
- Trowel
- Safety gear (gloves, goggles, respirator)
- Leveling tool
- Bucket for mixing
- Painter’s tape
- Materials:
- Epoxy resin kit (base and hardener)
- Decorative flakes or pigments (if desired)
- 3D printed or vinyl images (for the 3D effect)
- Clear topcoat epoxy
- Primer (if necessary)
Surface Preparation
Proper surface preparation is crucial for a successful installation:
- Clean the Area: Remove all furniture and clean the floor thoroughly. Any dust, debris, or grease can affect adhesion.
- Check for Moisture: Ensure that the substrate is dry. Use a moisture meter to test if needed.
- Repair Cracks and Holes: Fill any cracks or holes in the floor with an epoxy filler to create a smooth surface.
- Sanding: If the floor is particularly glossy or smooth, consider sanding it to create a better grip for the epoxy.
- Priming: If using a primer, apply it according to the manufacturer’s instructions and allow it to dry completely.
Mixing the Epoxy
Follow these steps to mix the epoxy properly:
- Read Instructions: Always refer to the manufacturer’s guidelines for mixing ratios and specific instructions.
- Measure Components: Accurately measure the epoxy resin and hardener using separate containers.
- Combine: Pour the hardener into the resin and mix using a drill with a mixing paddle for about 3-5 minutes until fully blended.
- Add Color or Flakes: If you want to include decorative elements, mix them in at this stage.
- Use Promptly: Epoxy has a limited working time, so ensure you’re ready to apply it immediately after mixing.
Applying the Base Layer
- Pouring the Base Layer: Start by pouring the mixed epoxy onto the prepared floor.
- Spread Evenly: Use a squeegee to spread the epoxy evenly over the surface, maintaining a consistent thickness.
- Use a Roller: After spreading, go over the surface with a roller to eliminate any air bubbles and ensure an even finish.
- Curing: Allow the base layer to cure according to the manufacturer’s instructions. This can take anywhere from a few hours to a day.
Adding the 3D Effect
Once the base layer is fully cured, it’s time to create the 3D effect:
- Prepare the 3D Image: If you’re using printed images, ensure they are cut to fit the area. For 3D designs, you can create a stencil.
- Placement: Carefully lay out the image or design on the cured base layer.
- Secure the Image: If using vinyl or similar materials, you may need to adhere it slightly to prevent movement.
- Pour the Clear Epoxy: Mix another batch of clear epoxy and pour it over the design. Use a squeegee to spread it evenly, ensuring the design is fully covered.
- Remove Bubbles: Use a heat gun or blow torch to pop any air bubbles that form on the surface.
Final Coats and Finishing
After the 3D layer has cured:
- Inspect the Surface: Check for any imperfections or areas that need touch-ups.
- Sand if Necessary: Lightly sand the surface if it feels uneven or if there are any imperfections.
- Apply Topcoat: Mix and apply the final clear epoxy topcoat for added durability and shine.
- Final Curing: Allow the topcoat to cure fully, which could take several days depending on the product used.
Curing and Maintenance
Once your epoxy 3D floor is installed, it’s essential to ensure it cures properly:
- Avoid Heavy Traffic: Keep the area free from heavy objects and foot traffic during the curing period.
- Temperature Control: Maintain a stable temperature in the room, as extreme heat or cold can affect curing.
Cleaning: After curing, maintain the floor with regular sweeping and occasional mopping using a mild detergent.
Maintenance of 3D Epoxy Floors
One of the significant advantages of 3D epoxy flooring is its low maintenance requirements. However, to keep the floor looking its best, some simple maintenance practices should be followed:
1. Regular Cleaning
Sweep or vacuum the floor regularly to remove dirt and debris. A damp mop with a mild detergent can be used for deeper cleaning, but it’s essential to avoid harsh chemicals that could damage the epoxy.
2. Prevent Scratches
While epoxy flooring is durable, it’s still wise to take precautions to prevent scratches. Placing felt pads under furniture and avoiding dragging heavy objects across the floor can help maintain its integrity.
3. Periodic Inspections
Regularly inspect the floor for any signs of wear or damage. Addressing minor issues early can prevent more significant problems down the line.
3D Epoxy Flooring Bangladesh
Like other epoxy floor coating 3D epoxy floor popularity increase day by day. Being attractive look now it’s become popular all over world. In Europe 3D floor first used, after that it’s become popular and now it’s also popular in Bangladesh. 3d floor mostly used in shopping malls, halls, offices, homes, restaurant and all types of party center. It’s easy to clean and maintain so that it used high traffic area.
3D Epoxy Resin Flooring Application and curing time:
3D floor require 2 days after final coating. If you have large area then you required to order 3D sticker and then applicator ready your floor. 3D floor curing time faster than epoxy floor.
Advantage of 3D floors:
Visual effect:
3D floor is attractive and make your interior stunning. It’s make your interior unique and create welcoming environment of home. Strength – 3D Epoxy floor is impervious against acids, chlorine and other harmful daily cleaners.
Durability:
3D epoxy floor is durable if compare with normal concrete floors. You can be used 3D floors at least 15 years of age, without any renovation or changing colors.
Easy to maintain:
Epoxy 3D floor easy to clean and maintain. There is no joints, cracks on 3D flooring so that not any fine dust damage surface.
Safe and eco friendly:
Epoxy 3D floor not not contain any harmful chemical so that it’s safe and eco friendly. Also hygienic that’s why suitable for restaurant and food court.
Fire resistance :
Epoxy and polymers are not burn so that 3D floor is fire resistant.
Area of uses:
- Stairs, hallroom and corridors.
- All types of showrooms , parking zone.
- Malls, boutiques area, offices.
- Hotels, food court, cafes and restaurants.
- Clinics, hospitals and pharmaceutical area.
- Exhibition halls, museums and movie hall.
- Living room, bedroom, kitchen and swimming pool.
Cost Considerations for 3D Epoxy Flooring
While the cost of 3D epoxy flooring can vary widely depending on the complexity of the design, the size of the area, and the materials used, it’s essential to weigh the investment against the long-term benefits. Generally, 3D epoxy flooring may have a higher initial cost compared to traditional flooring options, but its durability, low maintenance, and aesthetic appeal can offer significant value over time.
Factors Influencing Cost
- Size of the Area: Larger spaces will require more materials and labor, increasing costs.
- Design Complexity: Intricate designs or custom images can significantly raise the price.
- Preparation Needs: If the existing floor requires extensive preparation or repair, this can also add to the overall cost.
- Quality of Materials: Higher-quality resins and pigments may come at a premium but often result in a more durable and visually appealing finish.
3D Wallpaper For Room Walls
3D wallpaper for h has emerged as a captivating trend that offers unique visual appeal and a dynamic atmosphere. This article delves into the characteristics, benefits, design possibilities, and practical considerations of using 3D wallpaper for room walls, helping you understand why it might be the perfect choice for your next home improvement project.
Types of 3D Wallpaper
Before diving into pricing, it’s essential to understand the different types of 3D Wallpaper For Wall available:
- Vinyl 3D Wallpaper: Durable and easy to clean, vinyl wallpapers are often moisture-resistant, making them ideal for kitchens and bathrooms. They are also available in a wide range of designs.
- Textured Non-Woven Wallpaper: This type combines durability with breathability, reducing the risk of mold and mildew. Non-woven wallpapers are also easy to apply and remove, making them a popular choice for renters.
- Foam 3D Panels: Made from lightweight foam, these panels create a pronounced 3D effect and are often used for feature walls in living rooms or offices. They are easy to install and can be painted to match any décor.
- Fabric 3D Wallpaper: Offering a luxurious feel, fabric wallpapers can add warmth to a space. However, they may require more maintenance and are generally more expensive than other types.
- Custom 3D Wallpaper: For those looking for something unique, custom wallpapers can be designed to fit specific tastes or themes, though this option often comes at a premium price.
What is 3D Wallpaper?
3D wallpaper is a decorative wall covering that features designs capable of creating an optical illusion of depth. This type of wallpaper can range from simple patterns to complex scenes, enhancing the visual interest of a room. Made from various materials, including vinyl, fabric, and non-woven fibers, 3D wallpaper can be suitable for both residential and commercial spaces.
Types of 3D Wallpaper
Before diving into pricing, it’s essential to understand the different types of 3D wallpaper available:
- Vinyl 3D Wallpaper: Durable and easy to clean, vinyl wallpapers are often moisture-resistant, making them ideal for kitchens and bathrooms. They are also available in a wide range of designs.
- Textured Non-Woven Wallpaper: This type combines durability with breathability, reducing the risk of mold and mildew. Non-woven wallpapers are also easy to apply and remove, making them a popular choice for renters.
- Foam 3D Panels: Made from lightweight foam, these panels create a pronounced 3D effect and are often used for feature walls in living rooms or offices. They are easy to install and can be painted to match any décor.
- Fabric 3D Wallpaper: Offering a luxurious feel, fabric wallpapers can add warmth to a space. However, they may require more maintenance and are generally more expensive than other types.
- Custom 3D Wallpaper: For those looking for something unique, custom wallpapers can be designed to fit specific tastes or themes, though this option often comes at a premium price.
3D Wallpaper Price Per Square Foot
when considering a home renovation or redesign, one of the most pressing questions for homeowners and interior designers alike is: what is the price per square foot of 3D wallpaper? In this article, we will explore the factors influencing the
3D Wallpaper Cost the different types available, and tips for choosing the right wallpaper for your project
Factors Influencing 3D Home Decor Wallpaper Prices
When considering the price of 3D wallpaper per square foot, several factors come into play:
1. Material
The material of the wallpaper significantly affects its price. For example, vinyl is generally more affordable than fabric, but high-quality vinyl can still be costly. Non-woven wallpapers fall somewhere in between, offering durability without breaking the bank.
2. Design Complexity
Intricate designs that require more detailed printing or special techniques, such as embossing or texturing, will usually cost more than simpler patterns. Custom designs can also add to the overall cost, as they often require more time and resources to produce.
3. Brand Reputation
Renowned brands may charge a premium for their products due to their reputation for quality and design. While you can find budget-friendly options, investing in a well-known brand can often guarantee better durability and aesthetics.
4. Installation Costs
While some homeowners may choose to install wallpaper themselves, many opt for professional installation, which can add significantly to the overall cost. The complexity of the installation—especially for 3D wallpapers that require precise alignment—can also influence pricing.
5. Size of the Area
The total square footage you plan to cover will also impact the price. Many suppliers offer bulk pricing, so the more square footage you purchase, the lower the cost per square foot may become.
6. Shipping and Handling
If purchasing online, shipping costs can also affect the total price. Some suppliers may offer free shipping for large orders, while others may charge a fee based on weight and distance.
Where to Buy 3D Wallpaper
Finding the right place to purchase 3D wallpaper can also affect prices. Here are some options:
Home Improvement Stores
Big-box retailers like Home Depot and Lowe’s often carry a variety of wallpaper, including 3D options. They usually have a range of prices, from budget-friendly to high-end.
Specialty Wallpaper Stores
Stores that specialize in wallpaper often have a more extensive selection, including unique and custom designs. While prices may be higher, the quality and service can justify the expense.
Online Retailers
Websites like Amazon, Etsy, and dedicated wallpaper retailers offer a vast array of choices at various price points. Online shopping allows for easy price comparison, but buyers should pay attention to shipping costs and return policies.
Custom Designers
If you’re looking for something truly unique, hiring a designer or artist to create a custom piece is an option. While this can be more expensive, the result will be tailored to your specific vision and needs.
Tips for Buying 3D Wallpaper
When purchasing 3D wallpaper, consider these tips to ensure you get the best value:
Research and Compare Prices
Before making a purchase, take the time to research various options and compare prices. This will help you understand the market and identify any potential deals.
Order Samples
Many retailers offer samples of their wallpaper. Ordering samples can give you a better idea of how the design looks in your space and how the material feels.
Read Reviews
Look for customer reviews and ratings online. Feedback from others can provide insights into the quality of the wallpaper and the customer service of the retailer.
Consider the Installation
If you’re not comfortable installing the wallpaper yourself, factor in the cost of professional installation into your budget. Make sure to get quotes from multiple installers to find a fair price.
Plan for Waste
When calculating how much wallpaper you need, account for waste due to miscuts or mistakes during installation. It’s often recommended to buy an extra roll to cover unexpected issues.
Average Price Ranges
While the price per square foot can vary widely based on the factors mentioned above, here are some average price ranges for different types of 3D wallpaper:
- Vinyl 3D Wallpaper: $1 to $5 per square foot
- Textured Non-Woven Wallpaper: $2 to $7 per square foot
- Foam 3D Panels: $3 to $10 per square foot
- Fabric 3D Wallpaper: $5 to $15 per square foot
- Custom 3D Wallpaper: $10 to $30+ per square foot
These figures can serve as a general guide, but it’s essential to shop around and compare prices from different retailers to find the best deal for your specific needs.
Tips for Choosing the Right 3D Wallpaper
When selecting 3D wallpaper for your space, consider the following tips:
1. Define Your Style
Think about the overall style of your home or the specific room you’re redecorating. Whether you prefer modern, rustic, or eclectic designs, there’s a 3D wallpaper option to match your aesthetic.
2. Assess the Space
Consider the size and function of the room. Bright, bold patterns can make a small space feel more expansive, while softer designs can add warmth to larger areas. Additionally, think about the lighting—natural light can enhance certain designs, while darker spaces may require lighter patterns to brighten the room.
3. Test Samples
Many retailers offer sample swatches, which can be invaluable in helping you visualize how a wallpaper will look in your space. Test samples in different lighting conditions and against existing furnishings to ensure a cohesive look.
4. Think About Maintenance
Consider the upkeep of the wallpaper material. Vinyl and non-woven options are typically easier to clean, while fabric wallpapers may require more care. Understanding the maintenance needs can help you choose a product that fits your lifestyle.
5. Consult Professionals
If you’re unsure about your choice or installation, consulting with an interior designer or a professional wallpaper installer can provide valuable insights and ensure a successful outcome.
3D Wallpaper Home Decor
Lets see many facets of 3D wallpaper, its benefits, installation tips, and the variety of styles available to suit different tastes and interior designs.
How to Choose the Right 3D Wallpaper
Choosing the perfect 3D wallpaper for your space can seem overwhelming given the variety available. Here are some tips to help you make the best choice:
1. Consider the Room’s Function
Different rooms serve different purposes, and your wallpaper should reflect that. For example, a calming design might be ideal for a bedroom, while a vibrant pattern could energize a playroom or office.
2. Match the Color Palette
Consider the existing color scheme of the room. A 3D wallpaper that complements or contrasts effectively with the existing colors can create a harmonious look. Neutral colors often work well in spaces that require versatility, while bold hues can serve as a focal point.
3. Scale and Size
Take into account the size of the wall and the overall dimensions of the room. Larger patterns may overwhelm a small space, while smaller patterns might get lost in a vast room. It’s essential to strike a balance between the wallpaper design and the size of the area.
4. Texture and Feel
Think about the texture you want to introduce into the room. Smooth surfaces might work well in a minimalist design, while textured options can add warmth and character. The tactile quality of the wallpaper can also influence the atmosphere of the space.
5. Theme and Style
Identify the overall theme or style of your home. Whether you prefer modern, rustic, vintage, or eclectic decor, ensure that the chosen 3D wallpaper aligns with your design vision.
Installation Tips for 3D Wallpaper
Installing 3D wallpaper can be a fun and rewarding DIY project. Here are some tips to ensure a successful application:
1. Prepare the Wall
Before applying wallpaper, ensure that the wall surface is clean, dry, and smooth. Remove any old wallpaper or peeling paint, and patch up any holes or imperfections. A smooth surface will ensure better adhesion and a more polished final look.
2. Measure Carefully
Accurate measurements are crucial to avoid waste and ensure a seamless fit. Measure the height and width of the wall, and calculate how many panels or rolls of wallpaper you’ll need.
3. Use the Right Tools
Having the right tools on hand can make the installation process smoother. Essential tools include a utility knife, a straight edge, a measuring tape, a sponge or cloth for smoothing, and a wallpaper brush or roller.
4. Follow Instructions
Each wallpaper product may have specific installation instructions. Be sure to follow the manufacturer’s guidelines for the best results, especially regarding adhesive application and drying times.
5. Take Your Time
Rushing through the installation process can lead to mistakes. Take your time to ensure that each panel is applied evenly and that the patterns align correctly. If possible, work with a partner to help hold the wallpaper in place as you smooth it down.
Creative Ways to Use 3D Wallpaper
3D wallpaper is not limited to just accent walls; it can be used creatively throughout your home. Here are some innovative ideas:
1. Accent Walls
Creating an accent wall is one of the most popular uses for 3D wallpaper. Select a focal wall in a room—like behind a bed, sofa, or fireplace—and apply the wallpaper to draw attention.
2. Ceilings
Don’t overlook the ceiling! Applying 3D wallpaper to a ceiling can create an unexpected design element that adds drama and intrigue to the space.
3. Nooks and Corners
Small alcoves, reading nooks, or corners can benefit from 3D wallpaper. By introducing a unique design in these spaces, you can create cozy retreats that invite relaxation.
4. Furniture Backdrops
Consider applying 3D wallpaper to the back of shelves, cabinets, or bookshelves. This technique can add depth and visual interest without overwhelming the entire room.
5. Commercial Spaces
Businesses can also take advantage of 3D wallpaper to create a memorable atmosphere. Restaurants, cafes, and retail stores can use it to reflect their brand identity and create an inviting environment.
Maintenance and Care
While you use 3D wallpaper for house walls it will be durable if ensure proper care. Here are some maintenance tips:
1. Regular Cleaning
Dust and dirt can accumulate on textured surfaces. Use a soft, dry cloth or a vacuum with a brush attachment to gently remove dust. For deeper cleaning, refer to the manufacturer’s instructions on cleaning solutions.
2. Avoid Moisture
Most 3D wallpapers are water-resistant, but it’s essential to avoid excessive moisture exposure. Ensure that the wallpaper is not placed in areas prone to humidity, such as bathrooms without ventilation.
3. Repairing Damage
If a section of wallpaper gets damaged, many products are designed for easy repair. Keep a spare piece of wallpaper on hand for quick fixes, and follow the manufacturer’s instructions for patching or replacing sections.
Bottom Line
3D epoxy flooring is more than just a trendy flooring option; it is a transformative design solution that can enhance the beauty and functionality of any space. With its unique aesthetic appeal, durability, and ease of maintenance, it offers a compelling choice for homeowners and businesses alike. Whether you’re looking to create a stunning focal point in your home or an eye-catching entrance for your business, 3D epoxy flooring can deliver a stunning, customized solution that meets your needs.